So you've got a SilverBullet in your hands. Before you start sticking it into random locks and bending your perfectly manufactured tension tips - you'll need to do a few things first.
- 1. Learn your tool
Although it's well engineered and manufactured, some part are really small and prone to break under excessive force. How much force do you need to turn your key in the lock? You don't need more force with the tool.
Recognize the tensioners, have a look at the feelers.
Check out the graduations lines, the angle grooves.
Now you see it, it's your tool, and you will love using it as we do. More important than opening, think about preserving your tool. Because no matter how many effort you put into opening, if your tool breaks, you are done.
One taught me once, when opening, it's a three steps process: Eyes, Brain, Hands. First you look, then you think, and only at last you act. Only applying this precept you will open easily, and preserve your toolset.
- 2. Know your lock
Every lock is different from the other. How many discs, where to tension, anti-pick features...
The best way to really know a lock is to take it apart. Then you see clearly. You may also browse Internet and look for people that did it already and posted pictures. Forums like https://www.lockpicking101.com/ or https://keypicking.com/ are great places for that, among others as good as those.
Still, without taking anything apart, you can check the key, its length, the number of cuts, the quality of manufacturing (bad quality = no anti-pick usually). You can look through the keyhole, see the shape, count the discs... All this will help you understand better your target lock.
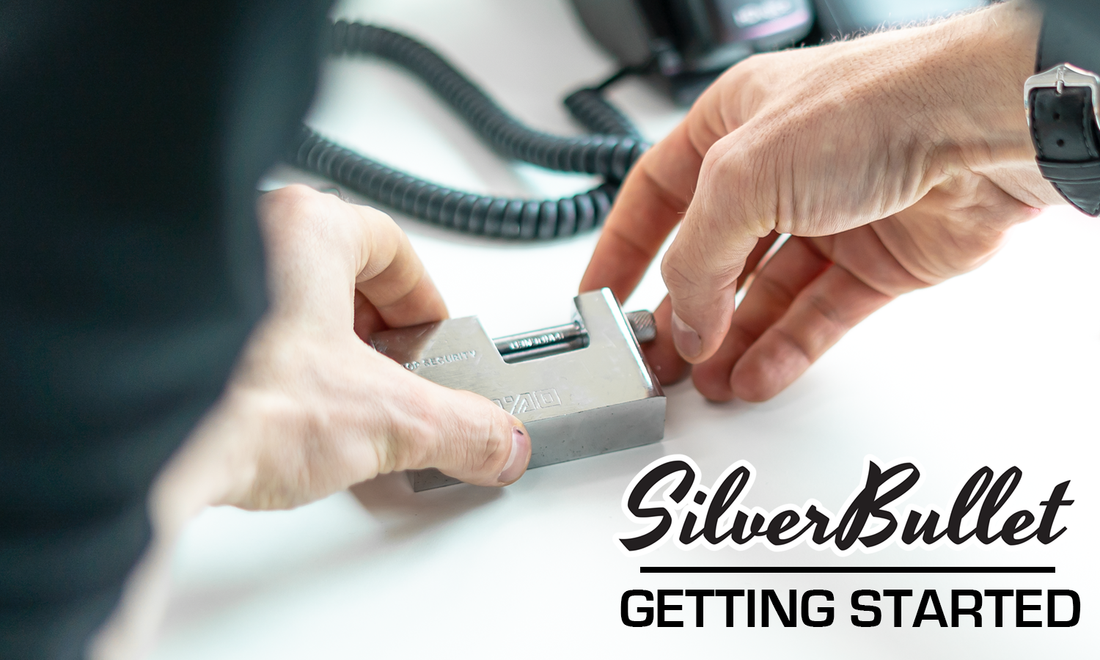
- 3. Setup your tool
As a modular tool, SB must first be set up properly for your target lock:
For the sake of explanation, let's assume that you are using the front tensioning tip, which is suitable for the majority of locks.
With the tool all taken apart, insert the tension tip in the external body, all the way in, and align it with the rightest (longest) decoding mark on the body. Thighten the screws.
Insert then the feeler all the way in the tool from the front, and place the internal body from the back. You will now want to align the feeler and the tensioner at the front, and in the same time align the straight line from the internal body with the rightest (longest) decoding line from the external body. Thighten the screws.
You are now set to pick your lock.
- 4. First time picking
Insert your tool in order to tension the lock, and make sure that you are only tensioning the first disc. Apply a LIGHT tension to the right.
With the feeler, enter the first accessible disc, and turn it slowly from left to right and from right to left. If this disc is binding, you should feel a scratching resistance while you turn, until you find the gate. You know that you found that gate because the resistance releases for a second.
If you feel no resistance at all while turning this disc, put it back in its original position and go to the next and try the same.
Once one disc is set, you don't want to disturb it while grabbing the next disc. To achieve that, you will push your feeler a little bit forward (until it hits the next disc), turn the feeler IN BETWEEN these two discs until you are aligned with the keyhole of that next disc, and then push the feeler to enter that disc. You can now test and pick that next disc.
Your tension force should be light but somehow constant. You may release tension with no risk of loosing your progress (discs are not spring loaded unlike pins in a pin tumbler lock), but you do need to apply tension in order to feel the gates.
Once all discs are in place, the lock will open just like magic!
- 5. First time decoding
To decode the target lock after picking, you only need to come back on every single disc with your feeler and check what angled graduation it is at. Doing it on all discs will give you the full code of the lock, allowing you to pick it again in seconds the next time, or even to cut a key.
Congratulations!
Now you've got a feel for the tool and the picking / decoding flow - the only thing remaining is to start collecting disc-locks and improving your skills.